What are mood boards?
A mood board brings your beauty brand to life using visuals rather than words. It’s the step between the business practice of defining your brand and creating your actual brand identity.
You can think of a mood board as an art project that you get to do for work! At its root, a mood board is really just a collage, like the kind you might have made in school. Except that it’s centered around your beauty brand, so it’s even more fun. A mood board is made up of images, colors, designs, and fonts. All of it should tell a visual story about your brand.
The ultimate goal is to capture the mood, values, and personality of your brand. You’ve worked hard to create your beauty brand’s story; the mood board is where you tell that story to your audience without words.
The 4 easy steps to create a mood board
The process of creating a mood board might seem overwhelming at first. It’s certainly a challenge to tell a story without words, and you want to be sure you’re in control of your brand message. You also want that message to be clear and resonant with your target market.
We’ll break down the whole process into 4 manageable steps:
1. Create a list of words or phrases unique to your brand.
2. Find fonts, colors, and images that relate to your words and phrases.
3. Put them together in a collage that tells a story
4. Get feedback to make sure your story resonates.
We’ve also put together a video overview of the mood board creation process here.

Step 1: Create a list of words or phrases unique to your brand
What words and phrases would you use to describe your brand to a stranger?
If nothing comes to mind right away, that’s okay. Just think about everything that makes your brand unique, and write those things in a list. Was your brand designed for acne-prone skin? Do you donate some of your proceeds to a charitable cause? Was your childhood cat the inspiration behind your first product? Write all of these things down, and bring in your own story where it’s important to the brand. It all ties into your unique selling proposition, or what makes your brand special.
Next, look over what you’ve written. Pull out the words and phrases that really pop, and make a list of those. The language you bring into your shortlist should be evocative. Each word should make you feel something. If you get a strong feeling when you read something, that’s a sign you should keep it. If you don’t feel anything in particular, toss it out.
Some examples might be:
- Bold and beautiful
- Sassy
- Gumption
- Elegance and grace
- Sun-kissed
- Conscientious
- Playful
- Affordable
- Accessible
Obviously, you want to pick whatever resonates with your brand and your story, but this should give you a place to start.
If you’re tempted to skip the last step and just use your original list of what makes you unique – don’t! This step is critical. What you want in the end are just the most essential words and key phrases. That way, you’ll have a strong focal point for your mood board and can avoid overwhelming (or a confusing) brand story.
Step 2: Find fonts, colors, and images
What fonts, colors, and images speak to your list of words and phrases?
Now that you’ve got your most essential words and phrases in a list, it’s time to translate those words into imagery.
It’s important that during this step you don’t overthink. Don’t worry about why you like certain things and not others. Let your intuition be your guide.
Also, don’t worry about whether the visuals you choose work well together or not. You’re not committing to anything at this stage. Simply choose the images that speak to you and let the process unfold organically. When you review everything later, you’ll very likely see patterns emerge.
Just as with the words you chose, keep an eye out for visual elements that evoke an emotional response. Ideally, you want your audience to have the same emotional reaction you do. So pay attention to how your visuals affect you. If you feel something when you look at an image or color, it’s likely that your potential buyers will, too. This is the first step toward building a brand that your customers will love.
You can find images both online and offline, depending on how you prefer to work:
Online: Google Image Search
To use Google Image Search:
- Create a mood board folder.
- Navigate to images.google.com and enter a word or phrase from your focus list.
- Scroll through the image results until something jumps out at you, then click into it to enlarge it.
- Right click to save the image to your folder, or click through to “Visit.” Find the image on the page that loads, then right click to save the larger image.
- Repeat as needed until you’ve got a good-sized collection of images.
Many images you’ll find on a Google Image Search are proprietary and can’t be used on your website. However, you can use them for your mood board, as long as you don’t plan to publish it to the public.
Online: Pinterest
To use Pinterest:
- Create a new pinboard.
- Search on Pinterest for your focus words and phrases and pin them to your new board.
- One great feature is that as you add pinned images, you’re creating a collage automatically. By combining your pins on a single board, you can see them all in one place.
- Voila! Instant mood board.
Offline: Magazines and Photos
If you prefer to look offline:
- Find magazines or newspaper images that feel similar to your brand.
- You can’t search for specific phrases as easily, so go with your instincts. Keep your words and phrases in mind as you look through printed images and see what feels right.
- When you find elements that work, cut them out and put them in a folder.
- You can also look through old family photos for inspiration, or take your own. Taking a walk with your camera can be an excellent way to pull in real-world images.
Packaging
While you’re on the lookout for fonts, colors, and images, keep an eye out for packaging designs that you like as well. You might create a separate packaging-specific mood board, or integrate it into your overall brand board. It’s important to keep packaging in mind early, since it is a critical way to distinguish your product from the competition.
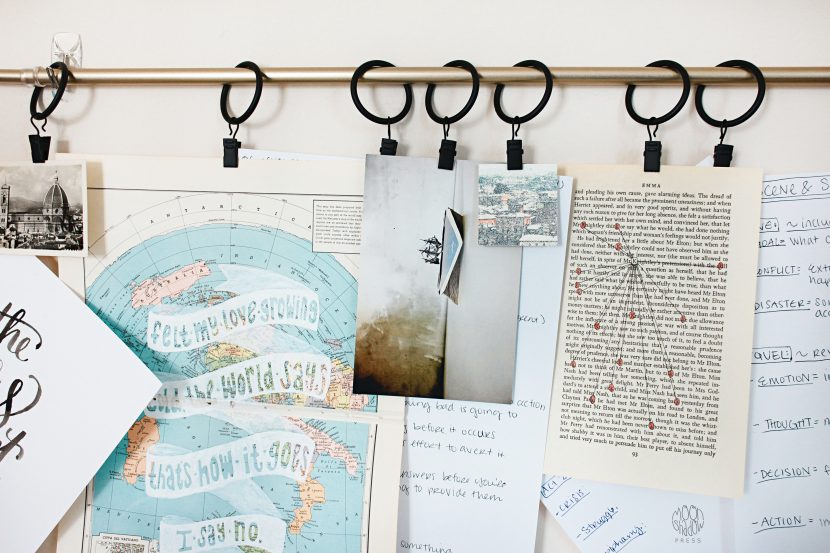
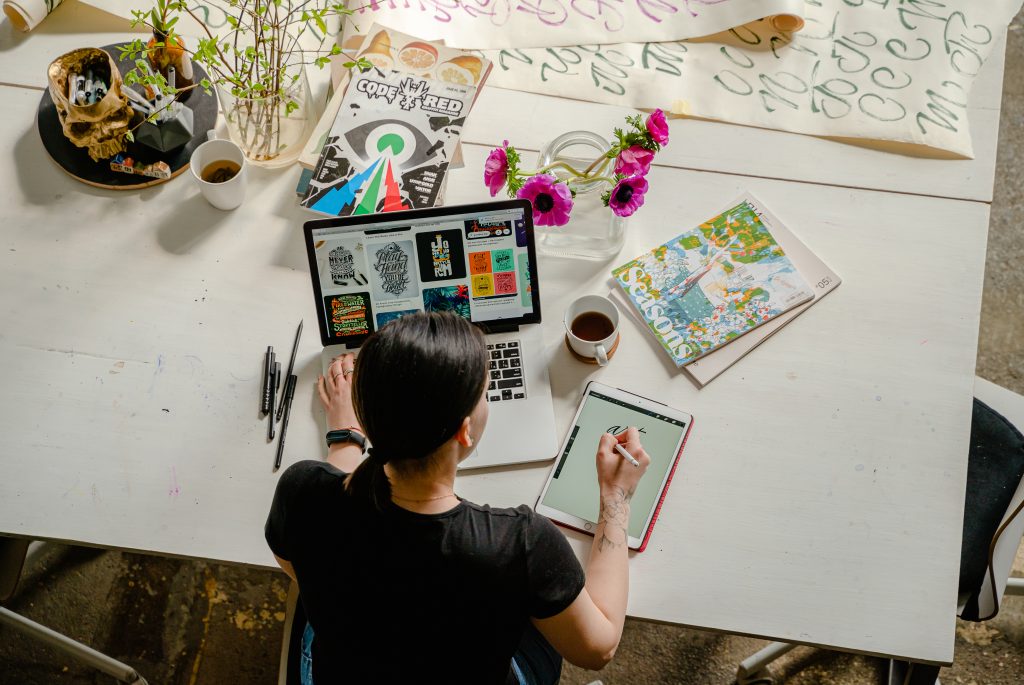
Step 3: Put it all into a collage that tells a story
You can complete this step online or offline – whatever is most comfortable for you. The actual medium isn’t important; the process and the visual story are all that matter.

Online Tools for Building a Collage:
- Canva
- Photoshop
- Word
- Pixelmater (Mac only)
- Pages (Mac only)
Canva:
Canva is a free program with lots of different mood board templates to choose from. It’s incredibly easy to use with minimal practice, so you’ll end up with something that looks polished even if you’ve never used Canva before.
Pinterest:
If you used Pinterest to pull images together, you can keep your collage there. Go through and rearrange them in Pinterest, or migrate them to create several different mood boards if you see separate patterns that don’t belong together but can’t decide what to keep.
Other Online Tools:
You can also use Photoshop, Word, Pixelmator, or Pages. Photoshop in particular has a steep learning curve, though. If you aren’t already familiar with how to use these programs, it’s probably best to stick with Canva or Pinterest to start.
Offline Collages:
If you’re more of a DIYer, or you just like to get your hands dirty on projects like this, you can print out online images and gather the magazine cut-outs and photos you filed. Take a piece of foam board (or a more than one if you have more than one mood board to make) and arrange the images in a collage. Once they’re in places you’re happy with, glue or tape the pictures to the board.
Your mood board should tell a story
Close your eyes and imagine the photo library on your phone, or a handful of photos sitting in a pile in a drawer. Many of the pictures may be beautiful, but the collection as a whole isn’t very appealing, right?
Now, imagine the same photos, but this time in an album or photo book that tells a story. Now those photos have a larger meaning. Now they make you feel something.
Your mood board should tell a story about your brand. Ideally, that story should communicate all of the emotion and intention behind the brand, but without words.
Review the images you selected. They should be there because they triggered an emotional response for you. (If not, go back to Step 1.)
As you start to arrange them, think about what you want your customers to feel about your brand. Place images with intention. This is not a haphazard and random collage; you want your mood board to look cohesive.
One way to achieve this effect is to create your board around a central theme. When reviewing your images, you likely noticed some themes that surfaced during the collection process. It could be that several of your images prominently feature water, or scenes showing families doing activities outdoors. If you do notice a particular theme, use that to guide you as you arrange your images.
Another option is to use a large image as a visual anchor. This is a great option if one image pops out as being especially striking. Find a mood board template in Canva that features one large image as a focal point. As you arrange other visuals, notice how they work with your featured image.
Step 4: Get feedback
The fourth and final step is to get feedback on what you’ve made. For many, this is the scariest step, but it shouldn’t be. It’s critical to make sure that your mood board can convey a message to others, and not just to you.
Approach a few people who are part of your ideal market, and ask them for their reactions. These could be customers or internal stakeholders like investors or team members. The goal is to find people with some kind of connection to your brand; their opinions will help guide you.
If you built more than one mood board, that’s great! Use the feedback to pick just the best mood board, and use that to inspire your logo. Once you’ve made tweaks based on the feedback you gather, you’re ready for the next step!
Things to Watch Out For
Creating a mood board shouldn’t be a daunting project at all. If anything, it’s one of the most fun steps in building your beauty brand! Here are some final thoughts on things to keep in mind as you ideate in this stage.
The process should be intuitive. Try not to dwell on why you like certain things and dislike others. Trust your intuition, and try not to “edit” images out of your mood board just because you can’t see yet where they’ll belong.
Think outside the box. Don’t limit yourself to visuals that you know will work well together. Some of the best brands have been created from unexpected pairings. Give yourself permission to play.
Create with intention. Make sure there is an intention behind everything that goes into your mood board. Every element should connect directly to your brand in some way. It might even be helpful to make notes about why some elements were selected, in case questions arise later.
Make more than one. You may very well end up with more than one mood board, and that’s okay. In fact, it’s great! Testing different concepts in front of customers and internal stakeholders is a great way to get a feel for what is resonating with people, and what isn’t. You may even find yourself combining elements from separate boards into one.
Ready for the next step?
If you enjoyed our mood board lesson video, you’ll love the Launch a Beauty Product course.
Learn How to Launch a Beauty Product covers every aspect of starting a beauty business, from creating a solid foundation and getting funding to manufacturing, branding, sales, and marketing. This guided approach keeps you on track and makes the process feel less overwhelming. The course includes a full 26-video series as well as 60+ worksheets and resource lists. To learn more about turning your product ideas into reality, sign up for our newsletters and read more about the course here.